[fibosearch]
Your Cart
Item added Item updated Item removed No more products on stock You entered wrong value.

No products in the cart.

Find a kit
big-momma-zombie-bkg-circle
escape-room-z-heading-title-glow

Setup Guide

Watch Out!

escape-room-z-game-puzzles8-decal-400x400-1 1
rebel-revolt-players-group-photo-400x400
escape-room-z-game-puzzles5-400x400-1

Zombies are everywhere!

And they’re hungry …

hungry for …

PIZZA!

Trapped in an apartment on the 28th floor, can you rescue the pizza, get the gun, unlock the door, and defeat the zombies?

What will such a feat of bravery and heroism take? Solving lots and lots of interesting, fun puzzles, of course!

Welcome to Escape Room Z, an hour-long puzzling adventure for you and your crew.

You're the host

zombies-player-smiling-400x400

As the host of this event, you will prepare everything so that your crew is ready to defeat the zombies and win the day. Keep scrolling down this page for all the setup instructions. Once the game is ready, join your friends and play!

Note: If you won’t be playing the game yourself, follow the same setup instructions but also use the bonus process map (contains spoilers!).

View the process map (complete spoiler)

Summary of Game Setup

Download and unzip the game zip file. Inside you’ll find the game itself, along with editable posters, invites, and designers kit for customizing.
From here it's super simple to get the game ready to play:

  1. Customize your game (optional)
  2. Print the DIY Escape Kit
  3. Prep the clue cards
  4. Get the escape party started by opening the Survival Guide
  5. Win the game by finding items/solving puzzles/defeating zombies!

Haven't downloaded the kit? View the game

Customize The Escape Game

(Optional)

Need inspiration? Check out how this teacher modified the Lost Mummy and created a thrilling new escape room game!

If you plan to play the base game without customization, continue to Print the DIY Escape Kit.

However, if you enjoy creating custom puzzles, you can easily edit the game using the Builder’s Kit included in the download. It contains the editable PowerPoint file and all creative assets:

  1. Open the PowerPoint.
  2. Customize whatever you want using the included artwork or your own.
  3. Mix and match elements or combine with real-world props, such as padlocks.
  4. Export the PowerPoint slides as photos ready for printing. The template ensures they’ll be perfectly sized and look great!

Here's the puzzle that Susan designed:

Susan designed this fun escape room puzzle by modifying the letters that come in the Props pack (you can change these to be whatever you like).
blood-words-example-300x239

Here's her story
I wanted to encode two messages using the letters.
One would be easy and obvious. I just taped the letters to the wall in backward order. I spaced them so that they were in a continuous loop – for a tiny extra bit of challenge.
My players quickly spotted the pattern and read the message backward.
I also wanted to hide a 5-letter combination that would open a padlock. By doing this, players would gain access to a kit bag that contained the rest of the escape game materials.
But how to do this?
I hit upon the idea of turning the 5 letters upside down.
Problem: if the letters were trimmed only a few of them would look upside down.
I wanted this to be a quick and easy puzzle, and I didn't want players using a lot of time, trying to figure out which letters were involved.
Then I realized that if I left the pictures intact, and did NOT trim the scissors diagram, there would be an obvious but still relatively straightforward hint that some letters were not like the others: the little scissors.
My clue was the word HURRY.
During the game, the players, to my surprise, spotted some of the letters but didn't grasp that only 5 were upside down and they spelled a word.
Ultimately, they did get it, after I hinted that there was something in there.
Next time, I'm going to provide a hint by way of a written clue somewhere in the room, so that they solve it quickly, as intended.
Because it was only 5 letters, once they wrote them down,
the players immediately got the answer, and there was a ta-dah moment.

- Susan's from Triangle Squares and a total escape room nut!

Upgrade Your Party With These Optional Props

  • backdrop3-zombies-amazon-400x400
    Giant Poster Halloween Decoration - 2PCS Bloody Window Posters, House Indoor Blood
    skull-zombies-amazon-400x400
    Plastic Human Head Skeleton Skull Figurines Sculpture for Halloween Home Decoration Craft
    nerf-guns-rebel-revolt-zombies-amazon-400x400
    2 Pack Blaster Guns Toy​ 60 Bullets for Nerf & 2 Wristbands, Guns Toys for Kids Age 4-8
    backdrop1-zombies-amazon-400x400
    Zombies Take Over Backdrop Banner (9 feet long by 6 feet tall) Halloween Decoration
    backdrop2-zombies-amazon-400x400
    Halloween Decorations Set - Bloody Backdrop & Garland Banner & Footprints Handprints
  • caution-tape-zombies-amazon-400x400
    Emopeak Zombie Caution Tape - Zombie Posters Pack, Fright Tape Bundle for Zombie
    blood-zombies-amazon-400x400
    Bloody Mary Fake Blood Makeup Spray - 0.25oz - for Theater and Costume or Halloween
    pizza-party-zombies-amazon-400x400
    Pizza Party Supplies Pack, Includes Paper Plates, Napkins, Cups and Cutlery (Serves 24)
    makeup-zombies-amazon-400x400
    7 Color Professional Makeup Kit Reel F/X Halloween Costume Makeup
    safety-goggles-zombies-amazon-400x400
    Anti Fog Safety Glasses Protective Goggles - Like A Mad Scientist - For Zombie Parties
  • backdrop3-zombies-amazon-400x400
    Giant Poster Halloween Decoration - 2PCS Bloody Window Posters, House Indoor Blood
  • skull-zombies-amazon-400x400
    Plastic Human Head Skeleton Skull Figurines Sculpture for Halloween Home Decoration Craft
  • nerf-guns-rebel-revolt-zombies-amazon-400x400
    2 Pack Blaster Guns Toy​ 60 Bullets for Nerf & 2 Wristbands, Guns Toys for Kids Age 4-8
  • backdrop1-zombies-amazon-400x400
    Zombies Take Over Backdrop Banner (9 feet long by 6 feet tall) Halloween Decoration
  • backdrop2-zombies-amazon-400x400
    Halloween Decorations Set - Bloody Backdrop & Garland Banner & Footprints Handprints
  • caution-tape-zombies-amazon-400x400
    Emopeak Zombie Caution Tape - Zombie Posters Pack, Fright Tape Bundle for Zombie
  • blood-zombies-amazon-400x400
    Bloody Mary Fake Blood Makeup Spray - 0.25oz - for Theater and Costume or Halloween
  • pizza-party-zombies-amazon-400x400
    Pizza Party Supplies Pack, Includes Paper Plates, Napkins, Cups and Cutlery (Serves 24)
  • makeup-zombies-amazon-400x400
    7 Color Professional Makeup Kit Reel F/X Halloween Costume Makeup
  • safety-goggles-zombies-amazon-400x400
    Anti Fog Safety Glasses Protective Goggles - Like A Mad Scientist - For Zombie Parties
These fun extras are sold on Amazon, and we get a small affiliate bonus for each purchase.

How to Print the DIY Escape Kit

In the game download, choose your print option:

Print as 4x6 Photos:

Print the photos at any office store or online via (Amazon Photo Print). To keep the gritty look and feel, choose matte/satin rather than gloss.

Or, Print at Home:

Open the PDF file Print at Home Version.pdf and print the escape kit on standard A4 paper.

Escape Room Z also includes optional props to make the experience even more immersive. Print any props you’d like from the Props folder. None of these are required to play the game, but if you want to go the extra mile, it’s totally worth it!

escape-room-z-game-puzzles2-400x400-1
Zombie
400px-Escape-Room-Z-212x300
A1-We-Crushed-It
A1-Painting-212x300

Prep the Clue Cards

escape-room-z-game-puzzles9-decal-400x400-1

Although you can play Escape Room Z on a table, like a board game, it’s much more fun to hide the puzzles around the room like a real escape game. For a truly immersive experience set it up in an apartment building living room, since this is where the storyline happens.

Feel free to be creative and customize to suit your needs - there's no wrong way to do this!

Just follow the steps below to set up the experience.

1: Place these cards anywhere

puzzles-to-place-anywhere

Place these 5 clue cards anywhere in the room. They’re great for hiding if that’s something your group enjoys.

Substitute: The colored QR code takes players to a website where they’ll enter a passcode. If you’d prefer to replace this with a combination lock or a real safe, click to expand the spoiler below.

2: Stick these cards on a wall

diy-puzzles-to-hang-on-wall

Stick these 4 cards to the walls around your escape room.

Substitute: Nothing.

Note: The props folder contains some bonus posters. If you print the zombie poster, ensure you include the zombie photo card as well since it’s required for a puzzle.

3: Stick zombies to external door

door-zombies

These 3 cards form a triptych when placed side by side. They simulate a hoard of zombies waiting for players on the balcony. Stick them to the glass on an external door.

Bonus: The props folder has a larger version of the message that you can cut out and place for extra style points.

Add a safe or lock (SPOILER)

WARNING: This Is A Total Spoiler For The Best Puzzle In The Game. If You'd Like To Play It Yourself Turn Back Now...

There's a QR code puzzle that takes players to this website on their phone where they'll enter a 4 digit passcode.
You can optionally replace this with a 4 digit combination lock, or a home safe, by removing the colored QR code card. Then set the combination to:

1428

Here's some easy at home alternates to a safe:
Any box with a combination padlock:

locked-padlock-box
A kitchen tub with a bicycle lock wrapped around it (the one in the picture wouldn't work for this particular puzzle because it uses letters, but you get the idea)
bike-chain-locked-box

4: “Lock” your oven or a box

puzzle-idea-oven

Obviously, any child safety lock your oven has isn't an escape room puzzle. So instead, we're going to rely on suspension of disbelief and attach a sign saying 'It's locked.'

Cut out the 2 hook signs and hang them on the oven door. Stick the child lock dials next to them. Make sure there are scissors nearby for players to cut out the dials. The oven is now locked and can’t be opened until players solve the puzzle!

5: Place the Pizza In your Oven

pizza-card

Place the pizza card inside the oven.
Substitute: A real pizza in the oven or some of these pizza keyrings so everyone goes home with a souvenir...
If you don’t have an oven, use:

  • A cupboard with a door
  • A box with a lid
The oven label can also double as a prop when playing as a tabletop game.

6: Get a weapon (optional)

nerf-gun-blood

Tape this card to a NERF gun or one of the options below, then place it somewhere visible. Players will be informed when they have earned access to the gun. (Check the spoilers at the bottom if you’d like to know how, but you can trust me).
Weapon Options:

How to make it even cooler

One of the other readers, Susan C, designed an easy trick to enhance this puzzle:

  • Cut the knobs out and place them on something metal.
  • Put a small magnet in the center of each one.
  • players will then be able to easily spin them.

Here's another example

Kara Dern didn't have an over, so she improvised this for her Airforce team building day:
oven-setup

7: Assemble zombie targets and make a firing range (Optional)

Prepare a zombie shooting mini game! This final challenge occurs after players have rescued the pizza, retrieved the gun, and unlocked the door.

Build all the zombie targets and line them up outside like a firing range. You can place them anywhere you like. (We did ours indoors because it was too windy that day).

Last Stand

Corde Lane, an escape room fanatic, designed an awesome shooting game “Last Stand”.
Here’s how it works:

How "Last Stand" works:

Last Stand

The nerf guns and zombie targets were by far the biggest hit! I created a "Last Stand" room, essentially this was a square marked with tape on the center of the floor.
Both teams kept asking about this "Last Stand" area which built up some great anticipation.

How it worked

I placed targets throughout the room at many difficulty levels. For example, the 100 point Big Mama was partially obscured behind an obstacle, while other significant point targets were a long distance away. This exercise alone lasted an additional hour, and no one complained!
The goal was to shoot down all 11 targets (cooperation goal) as well as score the highest points (competition). Once a target was down, it stayed down.

2 different NERF guns

I grabbed 2 different types of NERF guns to make it spicyer:
  1. Team A: The team who finished first shot first. They had the bonus ammo gun and took 3 shots at the different targets.
  2. Team B: They had a multi-shot gun and could choose two players who each got to shoot twice.
  3. The teams then cycled back and forth, with different players, until everyone had a shot.
  4. We then set the targets up again, and each team had another go.
In the end, collectively the two teams hit only 10 of 11 targets (and technically did not escape the room). However, no-one cared at this point since it was 11:30 pm and everyone was talking about impossible shots and their experience overall.

They loved it!

targets-puzzle-zombie-decal

Get The Escape Party Started

how-to-escape

Gather your friends and let’s get this party started!

  1. Break out the snacks and crack open the drinks
  2. Lay out paper, pens, and scissors
  3. Start one of the Spotify playlists below
When you’re ready to begin, give everyone a quick rundown on how escape rooms work since some people will have never played one before.

Open the Survival Guide on your phone at lockpaperscissors.co/z and watch the intro video together.

The Survival Guide also contains plenty of hints for solving each puzzle. Agree on how you will use the hints as a group before the game begins. As a rule of thumb, it’s time for a hint if players are stuck on a single puzzle for more than 5 minutes.

Now it’s time to start the game!

HINTS AND TIPS SURVIVAL GUIDE

Optionally Add extra Zombie Arrgh with:

Tips For Larger Groups

big-momma-zombie-bkg-circle-decal

Schools, Camps, & Youth Groups

  1. Split the group into several teams of 4-8 people that will compete for King of the Hill.
  2. Each group can play simultaneously.
  3. Teams require 1-2 mobile phones so they can look up hints in the Survival Guide and complete some of the challenges. The Survival Guide also contains solutions so if you have super competitive teams make players come to you where you'll give them the hint but they'll receive a time penalty.
  4. It's a race to the finish so there's no need to set a timer unless your day requires it.
  5. Make a big event out of revealing the winning team since this will be a highlight of the challenge.

grandpa-zombie-bottom-left-circle-decal

Corporate Team Building & Conferences

The Escape Room Z kit will take 30-60 minutes to set up and can be printed multiple times to scale to any group size (I've had a group of 130 people at a conference run one of the party kits).When running the game:

  1. Set the game up by following the Setup Guide. If space is limited just place all the puzzles in the middle of each team's table rather than spreading them out.
  2. Set a 60-minute timer.
  3. As the Game Master, you'll be the one giving out hints. This is super easy as they're all in the Survival Guide. Just open it up, on your phone, and when a group asks for a hint you can read them out.
  4. Set a time penalty for using a hint (2 minutes for a hint or 5 minutes for a full solution). Just do a tally of these and deduct them from the final times at the end.

Awesome Example from a Youth Retreat

This Is How Mark Duncan, From Winston-Salem NC, Modified The Game For High Schoolers:

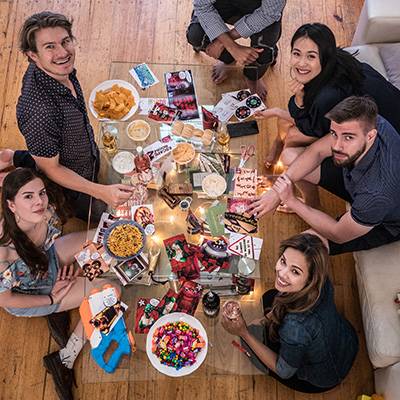
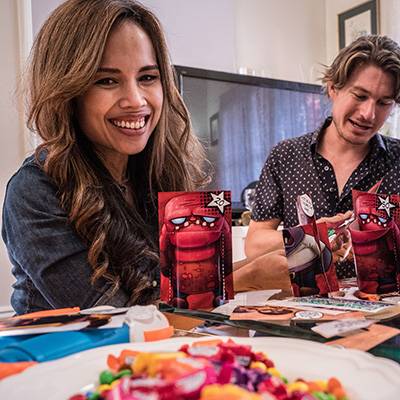
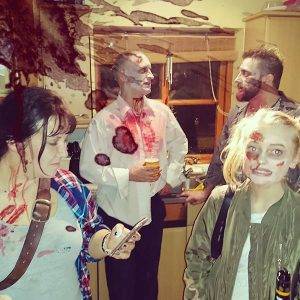
I ran Escape Room Z a couple of weekends ago with middle school/high school students and adult leaders. Our crew had about 32 people, so four teams of 6-7 and everyone finished within 90 mins, with the fastest team being 70 mins.

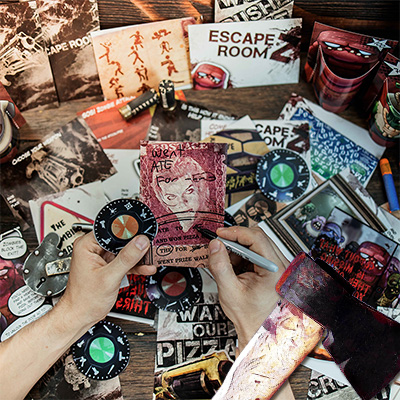
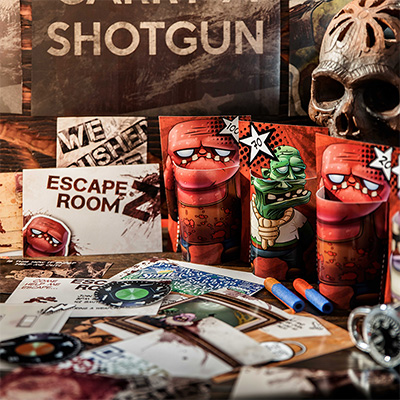
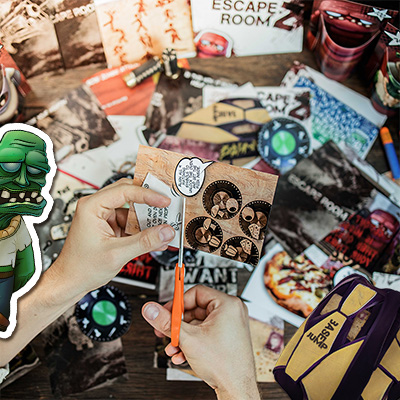
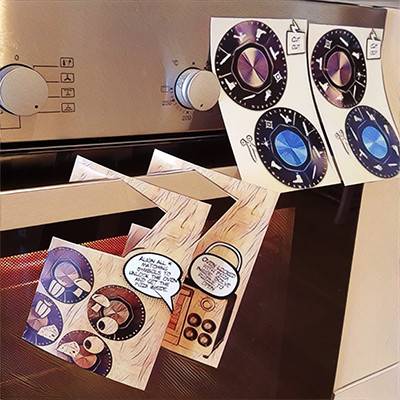
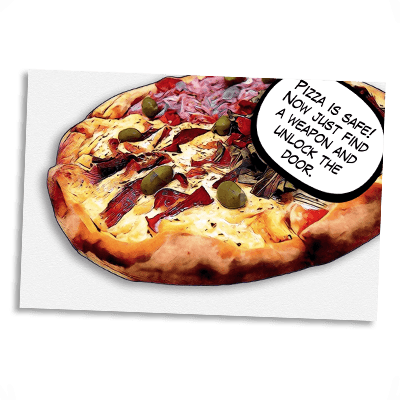
We mostly used the 4x6 picture puzzles and added a couple of real props of our own. Overall the game was enjoyed by all, kids really liked the challenge. I had to give a lot of hints, as the game was quite hard, but tried to let them push through it for a while before dropping any clues.

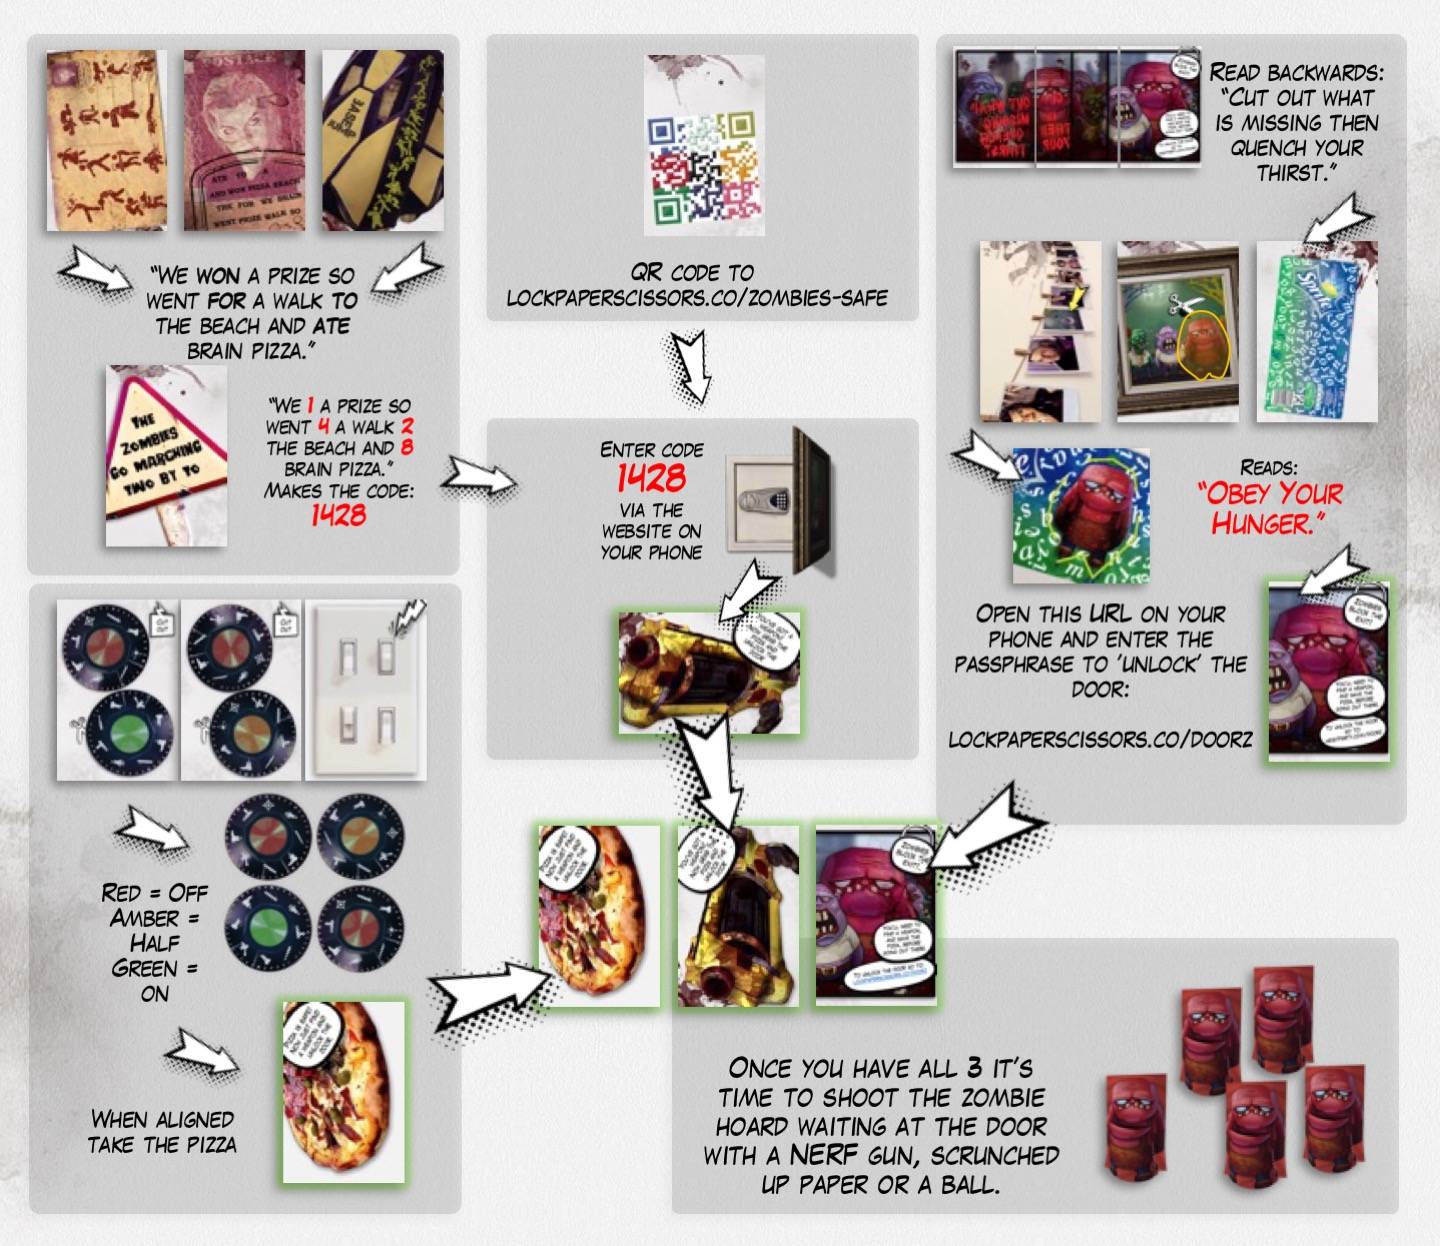
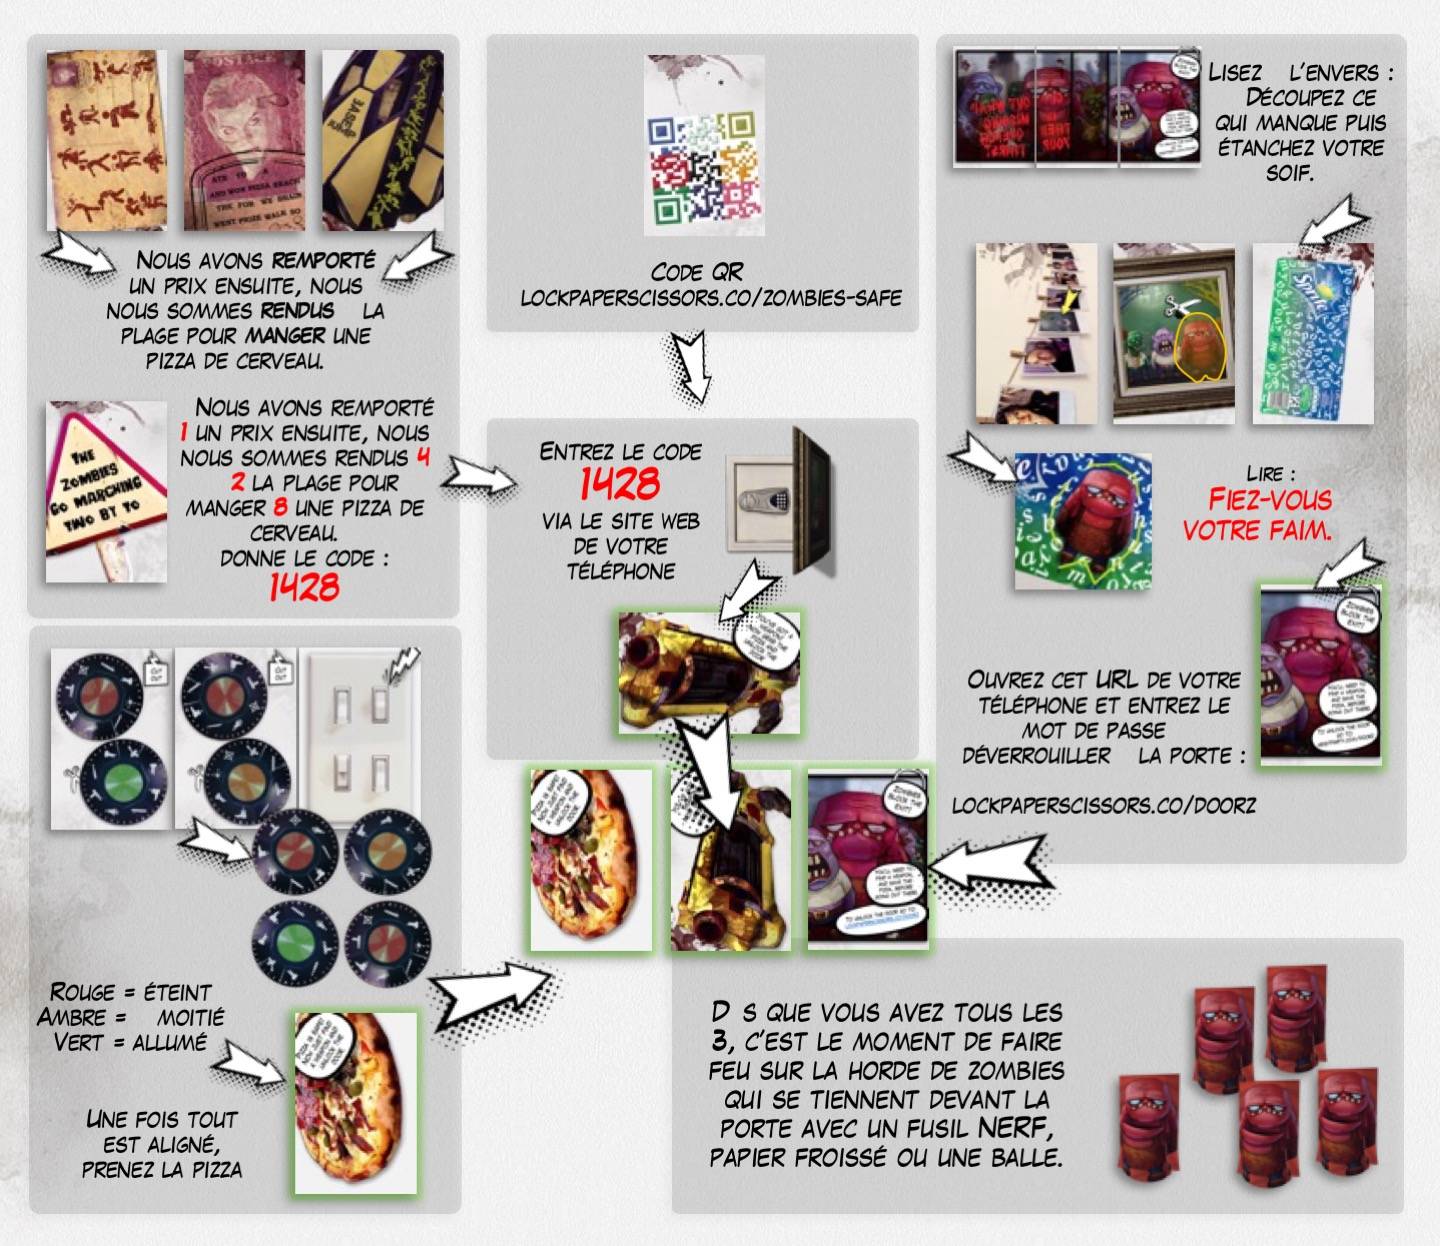
One puzzle I added at the beginning was to order 
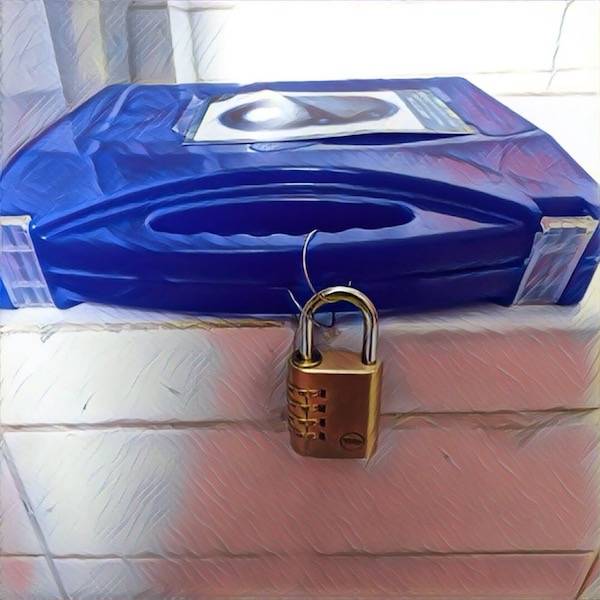
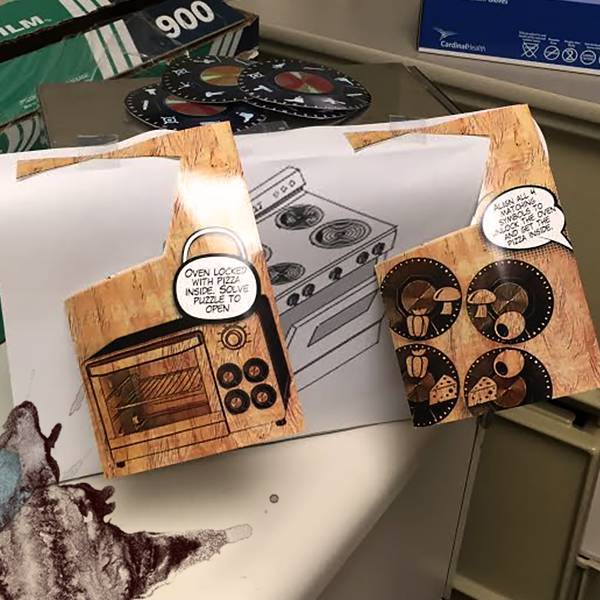
a case like this for each group. In it, I put their puzzle picture cards, a pair of scissors, and tape in each box. I set the combination to 894. I also had placed a mirror in the room in which had the word HID written in red fingerpaint (to look like a bloody message) and like a finger smear beside the D like the person was actually trying to write the word HIDE. The letters HID are a standard A1 Cipher.

Upon starting the game I gave each group their box and immediately they had to figure out how to open it. I did give them the clue that upon waking up in the apartment they found a note scrawled on a piece of paper that read Roses are Red, Violets are Blue, A is 1 and B is 2. I did not draw their attention to the mirror. This first puzzle took about 10 minutes before groups started figuring out that HID was the combination. This was a fun little starting puzzle to get to the real puzzles.

The case add-on was a lot of fun and was interesting to see which groups made opening their cases the priority as opposed to some groups who initially spent a lot of time inspecting the other items in the room. You could use really any three digit word on the mirror, at first I was going to use DIE with combo 485, but I thought HID was more curious and drew more attention that it might be more significant than just a message. Writing on the mirror just made sense since they needed it to view the backwards blood message too, and it was just a good creepy decoration.

I also thought handing each group a mysterious case was a lot more exciting than just the stack of photos alone. Spotify playlists were good too!

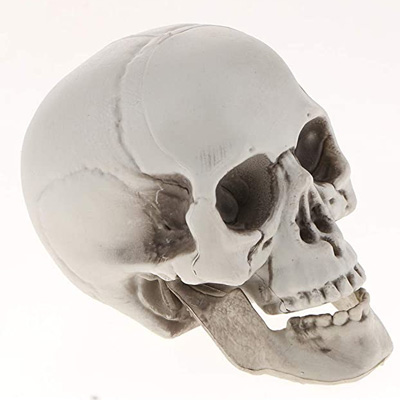
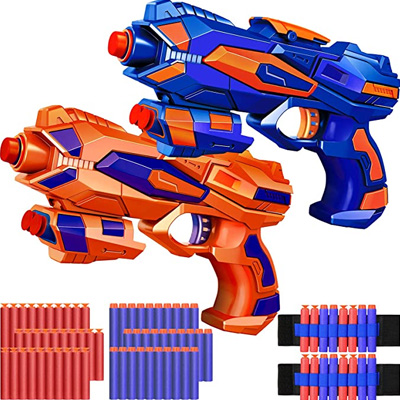
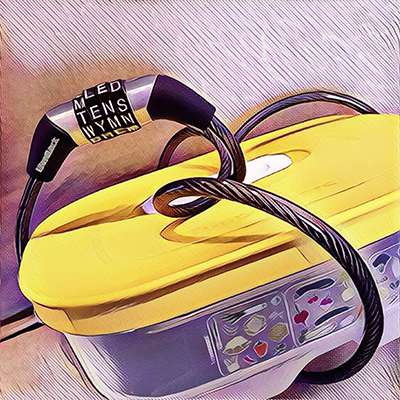
Additionally, we used a metal box and a combo lock which I put the nerf guns in, that definitely made it more exciting too. I believe you had made that suggestion on something I had read and it really made it more exciting to have hands on it.

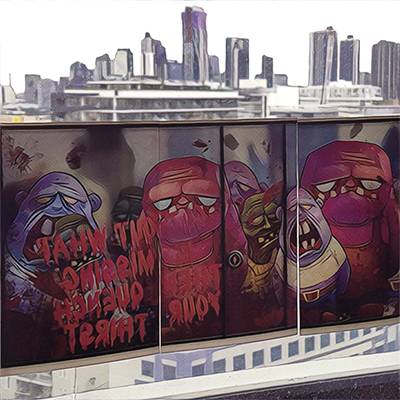
What made me laugh was the phrase Obey Your Hunger has come to be an inside joke for the students who went on the retreat, they think that is hilarious.

OPTIONAL: Theme Your Room

Escape Room Z comes bundled with optional props to make the experience super authentic. These are located in the Props folder when you downloaded the kit.

None of these are required to play the game but if you want to go the extra mile it's totally worth it!

zombie-escape-players-1-300x300
zombie-escape-players-2-300x300
zombie-escape-players-3-300x300

STOP

This is the Process Map for the Entire Game. Only read if you're not going to play the game yourself.

Click for the complete game process map & solutions (English):

Grab the escape room kit here if you haven't downloaded it yet.

zombies-process-map-english

Click for the complete game process map & solutions (French):

Grab the escape room kit here if you haven't downloaded it yet.

zombies-process-map-french

Want More Adventure?

envy-escape-game-and-party-props2-decal-400x400

Try Envy. A 1920's Gatsby style murder mystery game of debaucherous luxury and deadly feuds. Get ready for a night of velvet gloves, blood-stained.

It's a mysterious challenge perfect for house parties and PG-13 players.

VIEW GAME

(Save $7 with coupon code IWILLSURVIVE)

Copyright © 2023 Lock Paper Scissors Publishing.
Claim your free escape room kit
This DIY blueprint has the building blocks you'll need to get started, find puzzles, and CRUSH IT:
Post your party on our Facebook
If you enjoyed your escape room kit we'd love you to share a photo of your night as a Facebook review:
graffiti-arrow-right-graffiti-decal
usercartcross